And it’s finally done! I’m quite pleased with it even thought it is not perfect and there was a tiny mistake that costed me a few points of my nerd membership. More details on this later, after a short moment of self-gloating *extremely smug face*
Ok, now that my ego is satisfied, let’s move on to the details of these craft adventure. Aside for some little adjustments, I followed three tutorials of the Bookbinding University from Damask Love:
Materials:
- Canvas painted in my previous post
- Scissors and ruler
- White paper sheet
- Colored card
- PVA glue
- Big brush
- Some leftover cord
This part of the project is divided in three parts: first, “binding” (you’ll understand why I’m using quotes shortly) together the three notebooks; second, adding the inside cover to the journal; and third, joining the brick-journal to the painted canvas. The latter step stressed me a bit, but I managed it without messing up (too much).
First, the fake-binding
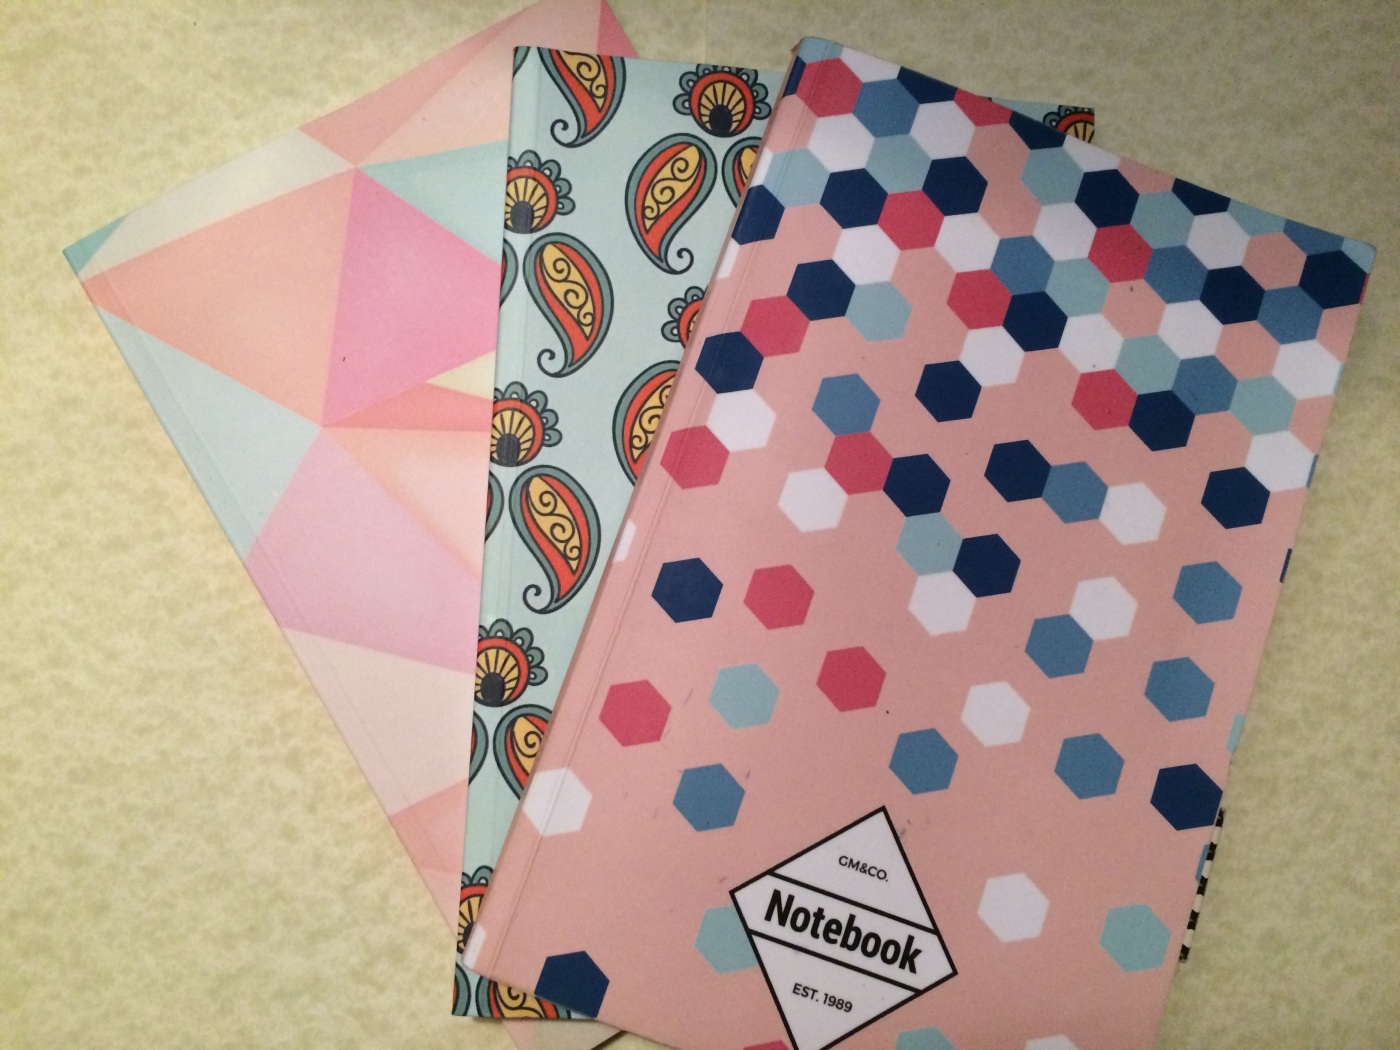
- I got three little notebooks from Amazon – I’ll spare you the details on how and why, that’s for another post- to ensure I had enough pages for 2017 and I needed to join them to pursue my master plan.

- That meant removing the cover, I felt a bit bad because they are really cute, but I kept them to up-cycle them in something else. I’ve used a paper cutter and that was the result.
 Prepare the notebooks
 Prepare the notebooks
The first picture is me trying to look all crafty-bloggy like.
- The next step would have been to create the text block following Damask Love’s tutorial How to Make a Text Block, but just when I was about to do it, I realized my three notebooks needed to become one. So, after a moment of loss and desperation, the light bulb sparked in my brain and I joined them using a paper band.
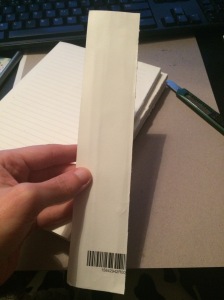
- The piece of paper is 1″ larger than the spines of the 3 books together, so put some glue on one of the side about 1/2″ and put it on the first notebook. Then, I aligned and blocked under Willy and glued the rest it carefully to the spine and to the side.
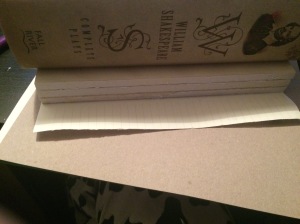
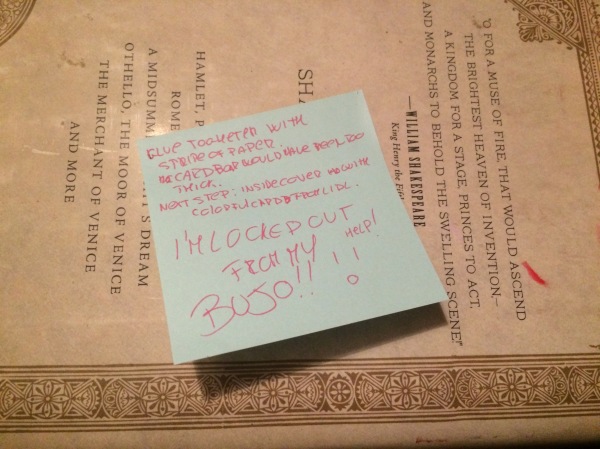
- I let it overnight to dry, after discovering with distress that I had locked myself out of my bullet journal and I couldn’t document the progress. Just in case, I left a note to tomorrow’s myself.
- The morning after, I had a big brick-journal.
Second, the inside cover
- With my new triple-notebook all glued and dried, I proceeded to add the inside cover following Damask Love’s Tutorial How to Make a Text Block at 16:32 – Adding Cover Pages to the Text Block.
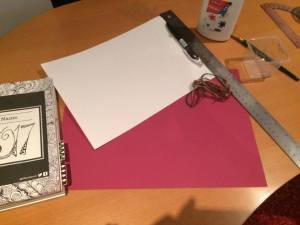
- I gathered my supplies: ruler, scissors, glue, a brush, the cord, a sheet of white paper and a sheet of bordeaux card. I really like this color, it fits with the dark cover really well!
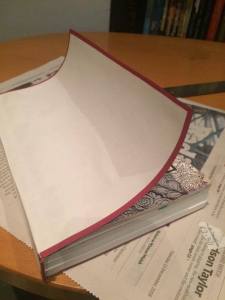
- I followed step by step the tutorial, the pictures below show the headbands in the making and the cover applied.


- After a night of drying under my faithful Willy, this was the result. It looked nice, but the suspicion that the card was to thin started showing.
At last, it all came together
- The tutorial How to Make a Hard Cover was so clear and I followed it devoutly. I didn’t find the cardboard she mentioned in the video: it was either too big, too expensive or too many, so I resorted to use the cardboard at the back of two notebooks. Everything can be re-purposed – said the hoarder.


- I let it dry overnight again and this was the result in the morning. I admit I went to check it even before having my coffee 🙂
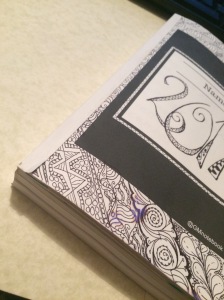
- Finally, I attached the cover to the journal and a few hours after I had a really nice journal with… a mistake in the cover! Can you see it?


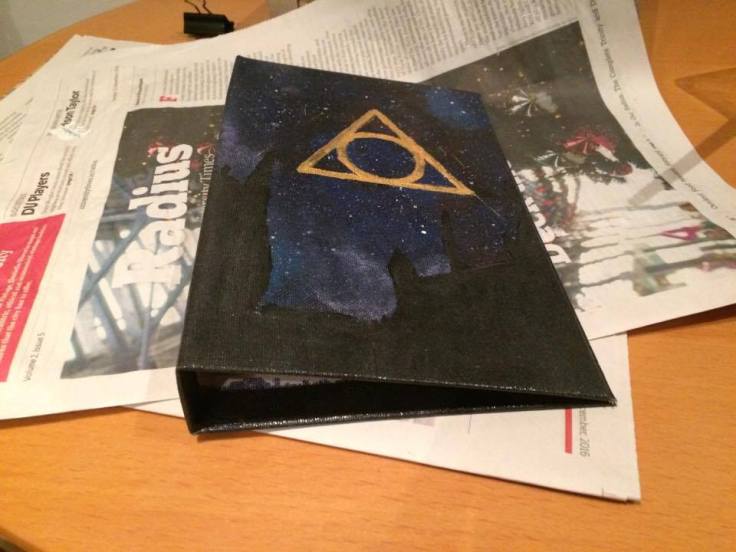
I was really blinded by love because I stared at it for hours and didn’t notice until it was pointed out in a Facebook group. Luckily, it was a quick fix with a bit of gold paint and now I’m the proud owner of a custom-made Harry Potter bullet journal!
Few final thoughts
There are a couple of imperfections:
- the bordeaux paper was too thin or too much glue was used, so the inside is a bit wrinkly and some of the first page stuck to it.
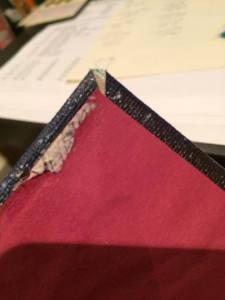
- one corner of the canvas is not perfectly folded so the cardboard is visible.
And a couple of extra-features to keep in mind that would be nice to have:
- ribbon page markers, but they should have been added before the headbands.
- ribbons to wrap around to close it, but it would have involved some cutting of the canvas and some more brain work…
Overall, I loved working on this, I must admit I’d been staring at it a lot, and caressing the cover, and… OK, yeah, I’m weird… don’t judge me! But it feels like having a real hard cover book that will tell your own story. I will enjoy at the end of 2017 to go through the pages as I’d be reading a novel.
Anyway, time to wrap this up and move on to the next project, which is still undecided: keep an eye on my Instagram to see what I’m messing around with on a daily basis. Before leaving, here two details from the finished book.


Hope you enjoyed the read and that this post may inspire you!

January 26, 2017 at 3:15 am
That is so awesome! I love it 😊
LikeLike
January 26, 2017 at 7:08 am
Thank you 😊
LikeLiked by 1 person
January 26, 2017 at 4:57 pm
Wow, that’s true dedication! Love it!
LikeLike
January 26, 2017 at 8:45 pm
Thank you!! 🙂
LikeLike
May 4, 2017 at 3:13 pm
Oh I love it. I’m a Harry Potter nut too. And the imperfections just add character 🙂
http://www.diyingmachine.wordpress.com
LikeLiked by 1 person
June 5, 2017 at 12:29 pm
Thank you 🙂 I’m really happy with it, and it’s still holding well, even after a small water-bottle-in-bad-accident!
LikeLike
June 5, 2017 at 5:38 pm
Oops, well i’m glad it survived 🙂
LikeLiked by 1 person
June 5, 2017 at 6:38 pm
I’ll never learn 🙂 I should add a waterproof sleeve for my book and bujo in my to do list…
LikeLike